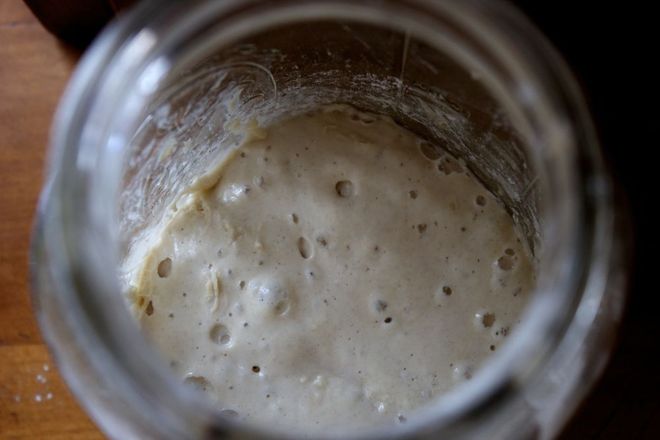
 My sourdough starter on day two, bubbling away.
Something my city self had imagined my country self doing every week once we moved here was baking fresh, delicious, crusty, bread. Ha - yeah, right! As people say, "life happens", and lately, it has really been happening. Despite the best of plans and intentions, there's always an unexpected event that sucks up a good chunk of the day and just having the time and energy to clean up after dinner can seem like a stretch. It started to look like bread making might be joining the more obscure "to-do wishes" on my list (like making a hat band from our guinea feathers and painting a Dutch hex on our well house... maybe next year??).
I'm beginning to realize that sometimes, you just have to make time, even if it means putting off cleaning the coop until tomorrow (or the day after...ehm). Yesterday morning, after cleaning up from milking, I decided it was prime time to take a step towards having good bread. It was a baby step that I only needed about 5 minutes to accomplish - perfect!
 I put together the beginnings of a sourdough starter. With just some flour and water you can capture and culture the wild yeast that exist just about everywhere, floating in the air (cool, right!?). Every 12 hours you "feed" the starter until it is strong enough to use as the leavening agent in a bread recipe, withstand cold storage, or be shared with a friend. In just a few days my starter will be ready to use for that loaf I've been envisioning for the past year! Want to try?
Here's what you'll need:
- flour (unbleached all purpose, you can use whole wheat, but some people have reported off flavors)
- water (filtered - make sure there's no chlorine in the water if you're using tap)
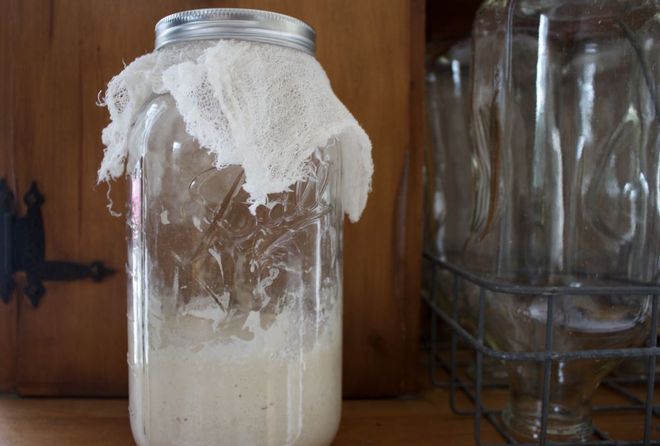
- a large glass or ceramic container (I'm using a half gallon jar)
- cheese cloth (to cover the jar opening, allowing air and yeast to come into contact with the starting medium, but keeping bugs out)
Here's what I did:
In a small bowl, I mixed 1/4c flour with 3 Tbs water. I poured this into my jar and covered with the cheesecloth (I used the ring from the canning lid of my jar to hold the cheesecloth in place, but you could also use a rubber band). 12 hours later I stirred this mixture and added another 1/2c flour and 1/3c water (close to room temp is best). For a week to 10 days, I'll be feeding my starter every 12 hours with a mixture of 1/2c flour and 1/3c water.
After a week, the starter should be strong enough for use or storage. If you aren't ready to bake once it's ready you can store it (covered) in your refrigerator. Just be sure to take it out and "feed" it again with 1/2c flour and 1/3c water 12 hours before you plan to bake. If you'll be baking often and want to leave your starter at room temp, after the first week you should be able to keep it alive by feeding it just once a day.
There are lots of great recipes for bread, biscuits, pancakes and even waffles out there using a homemade starter (just google it) and I can't wait to give them a try! After just a few days my starter is already nice and bubbly and smells pleasantly yeasty and sour - like freshly baked sourdough!